Rosie and Mabel go to work

Lookin awkward

Lookin’ awkward

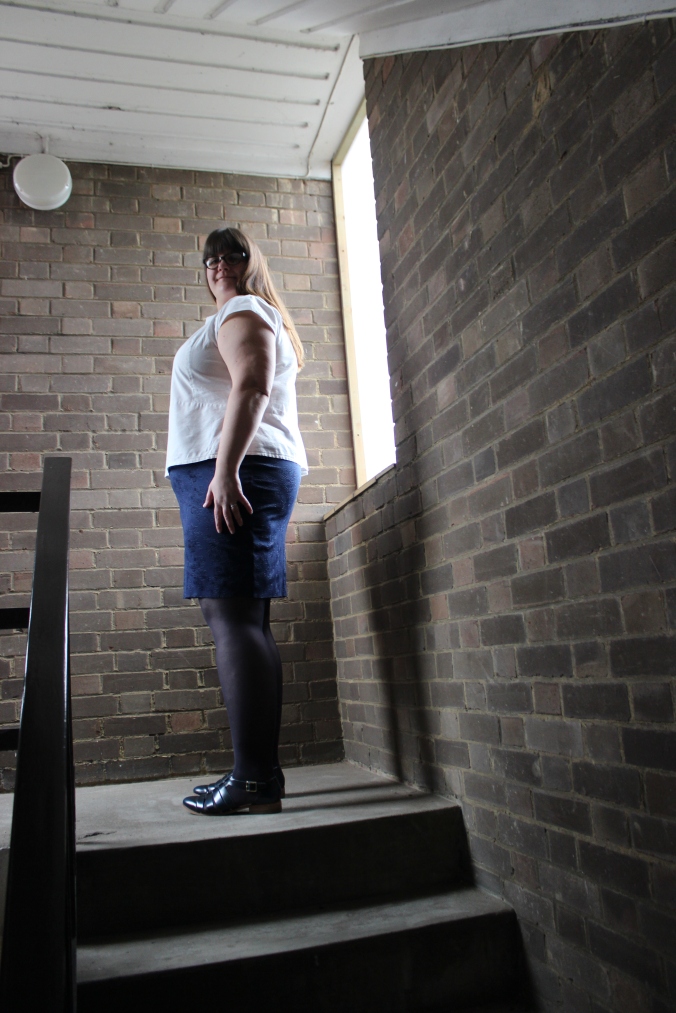
It’s been so long since I’ve blogged something I made, I have entirely forgotten how to stand in interesting and flattering angles. Not that I was very good at it, but I was making a small amount of progress that is now forgotten. So apologies for the pictures of me looking like a sack of potatoes. The things I am blogging here are actually quite nice. I made some things I can wear to work and look sensible. Obviously I wear everything else I have made to work as well, but this stuff is actually workplace appropriate. I’m shocked!

Still awkward

Still awkward

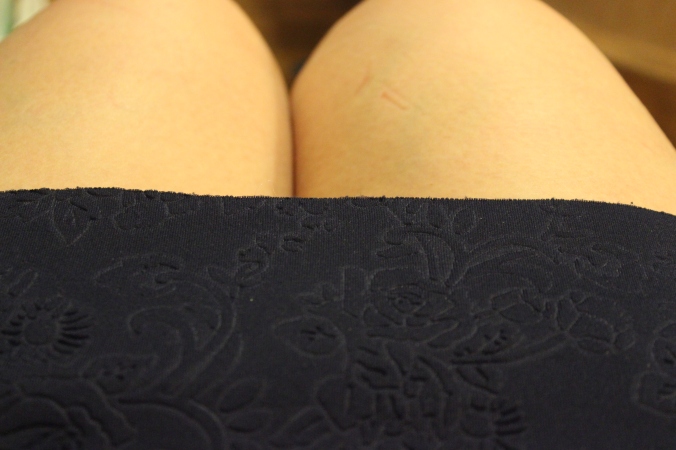
I have made three Colette Mabels of late: I love a tight stretchy short skirt. They are all weirdly and wildly different. And two of them came up waaaay too big. And the other is very snug. Fabric choice matters folks. This one is made in some lovely embossed scuba from Fabric Godmother which is super comfy and lovely to sew with. Also: it doesn’t need hemming! JOY ALL ROUND.

Scuse knees, look at lack of hemming

Scuse knees, look at lack of hemming

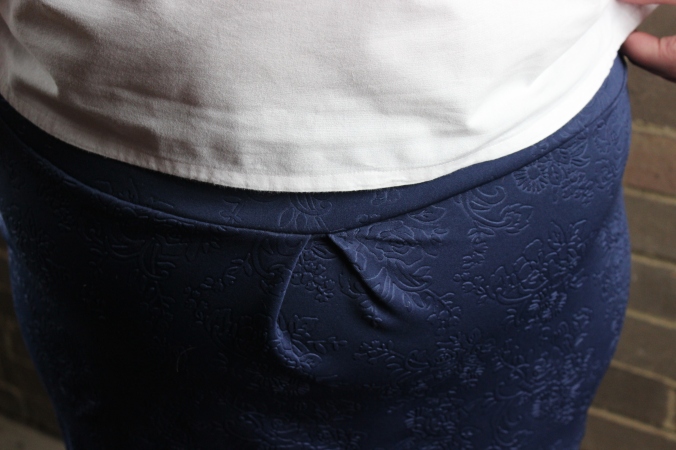
I did something weird with cutting it out (I think I cut half the version with the button placket and the waist band without or something) and so I added an odd waist pleat in an homage to my Imagine Gnats skirt but I quite like it.

Room for expansion

Room for expansion

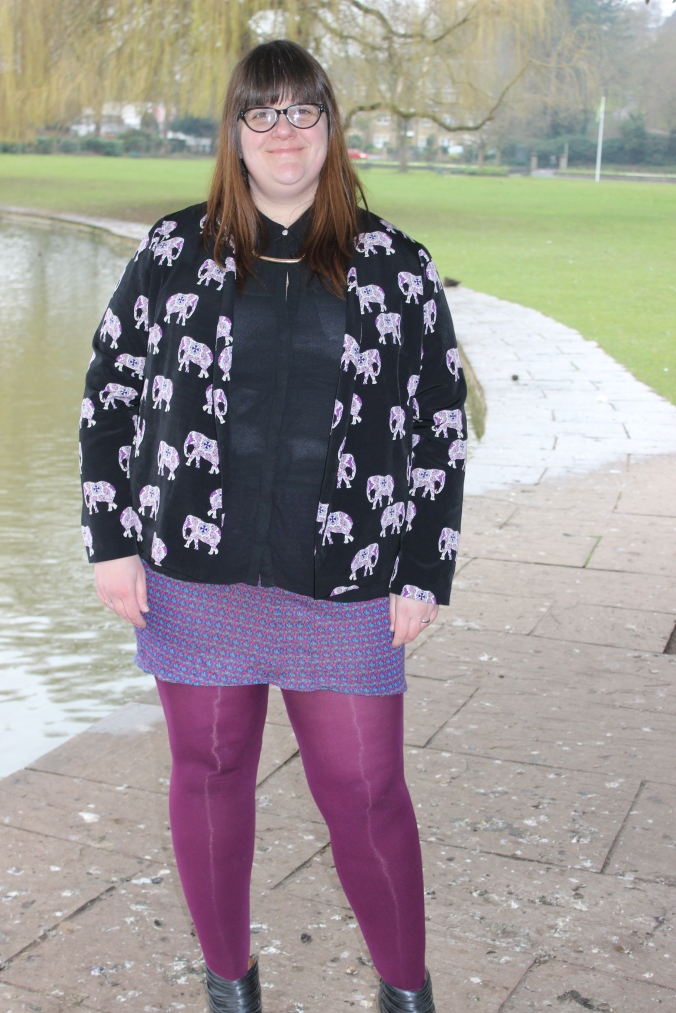
The Mabel pattern is great and I will make many. The first one I made was a quicky using less than a metre of left over fabric from the cardi I made for my Granny . I really didn’t have quite enough fabric so it is hemmed with the most miniscule hem and has gone all wavy
Wavy

Wavy

Also, it's REALLY short

Also, it’s REALLY short and my shirt has gone see through with the flash and my tights are very shiny

I put the centre strip thing (version 2) on this one, but the pattern is so busy you can’t see it, and I couldn’t be bothered to sew any buttons on because the hem is so wavy, and its really a bit too short to wear to many events. Or at least for being workplace appropriate.

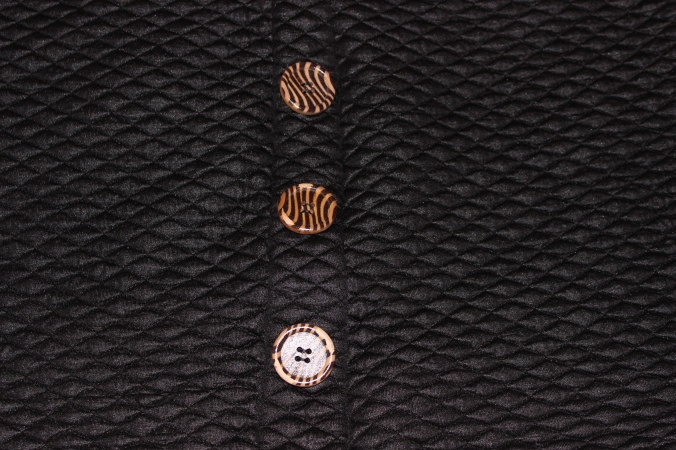
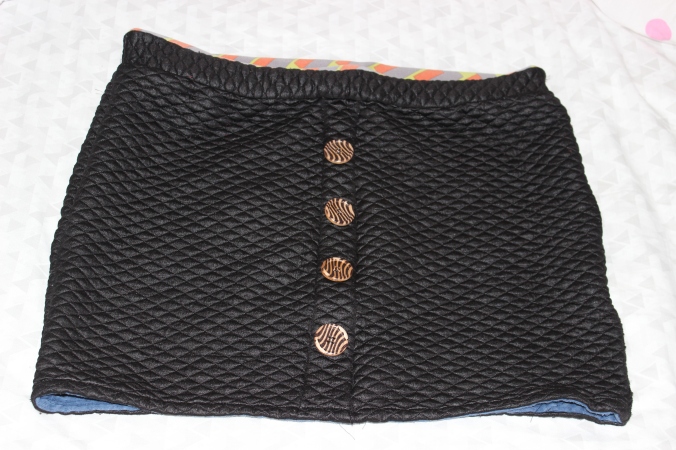
I think my most successful one is my black quilted one. I wear this all the time , and as you can see, the cheap (£2.99 a metre from Minerva crafts) is beginning to pill, but I will wear it until it falls apart. It’s got wooden zebra buttons OH YEAH.

IMG_1976 IMG_1975

It has a snazzy contrast facing at the waist which I made no attempt to get to sit inside as its snazzy and I wanted it to peek out. As you can also see it has a bit of blue jersey binding at the hem as this fabric frayed loads but was also bulky so I didn’t want to double fold it. This is a bit less stretchy than would be ideal, but looks a bit flash.

IMG_1988

This is a much better length and I like it a LOT. I bought loads of this quilted stuff in burgundy and black, and though it is disgusting to work with (it frays, its sticky and feels more like melted plastic than fabric) I’m going to make a matching raglan sleeve sweatshirt in it. It’s lovely warm and stretchy and looks ace.

IMG_1955

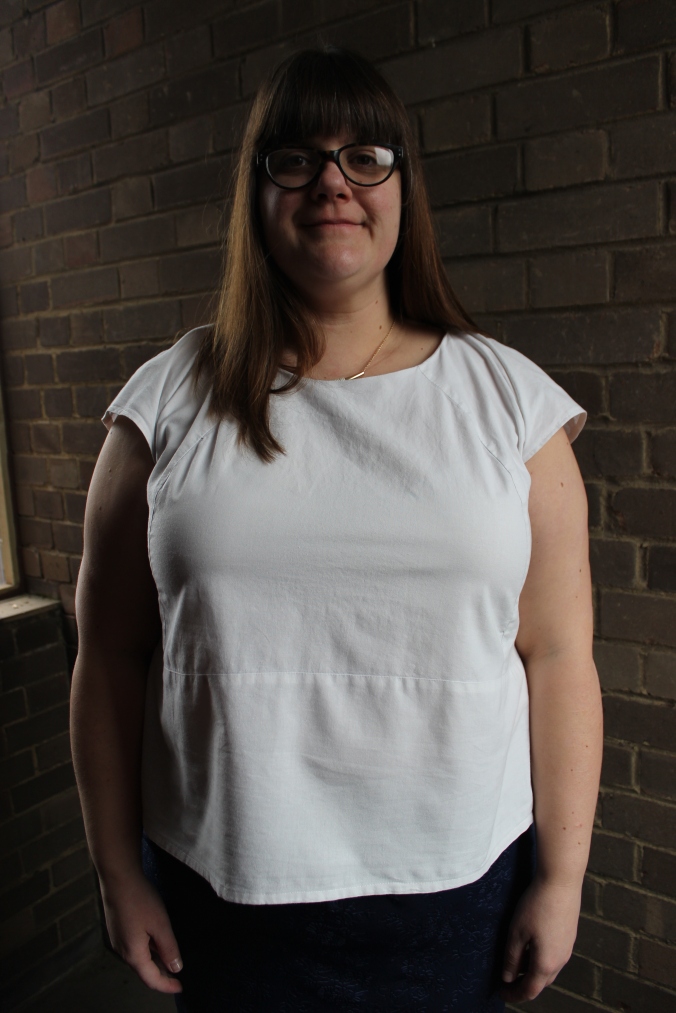
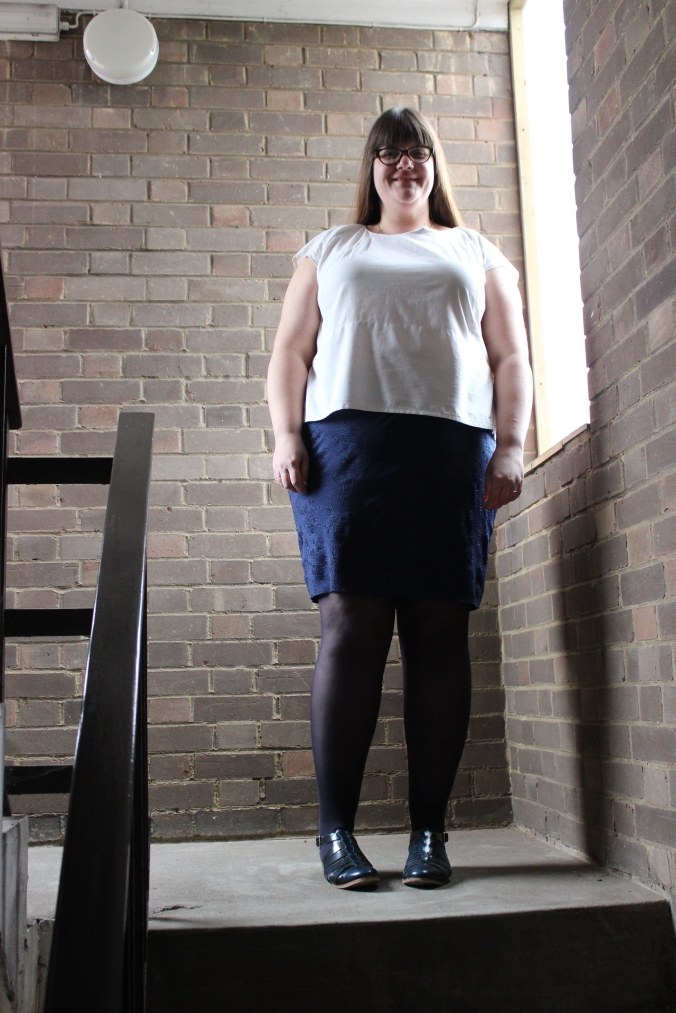
The top I am wearing with the blue Mabel is the Style Arc Rosie. Well I had to make a pattern with my name all over it didn’t I? Also I really like the style. It’s simple but interesting. As usual, the instructions are basically non existent, but this is quite simple and easy to work out. I definitely didn’t do the shoulder and neck facings quite right as they stick up and have too much fabric in both the versions I made: I think I should have done a lot more grading. Or at least some grading. Oh well.

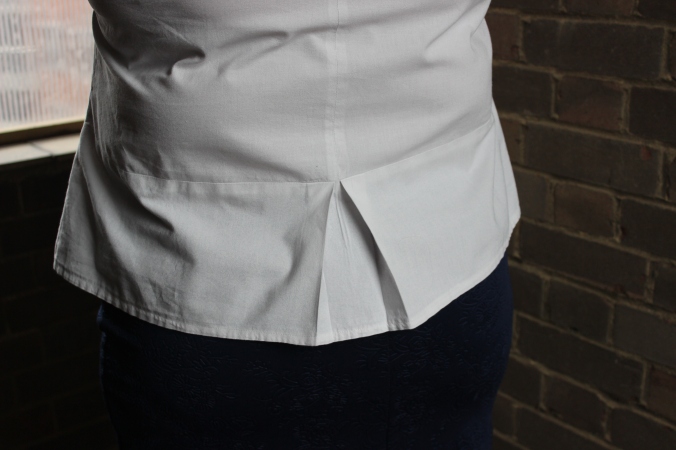
Bum bustle

Bum bustle

It has a neat little inverted pleat at the back which I like a lot. I love this top: they are ideal for work. Smart but comfortable and not too traditional. The white on actually has very tiny flowers printed on it in a slightly whiter white than the fabric, but you can’t really see it in these photos.

Can you see it here?

Can you see it here? Not really!

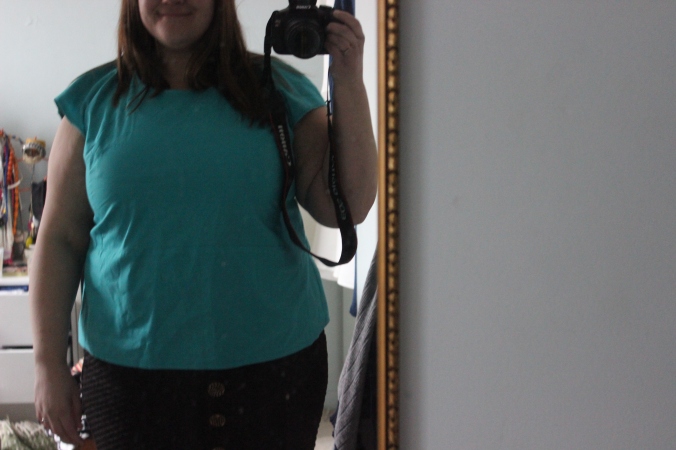
I also made a version in some turquoise kona cotton I had bought before I realised quilting cotton was for quilting. D’oh. This actually works well for this type of simple top (apart from the bulky shoulders) but I think I look like I am wearing scrubs!

Doctor in the House

Doctor in the House

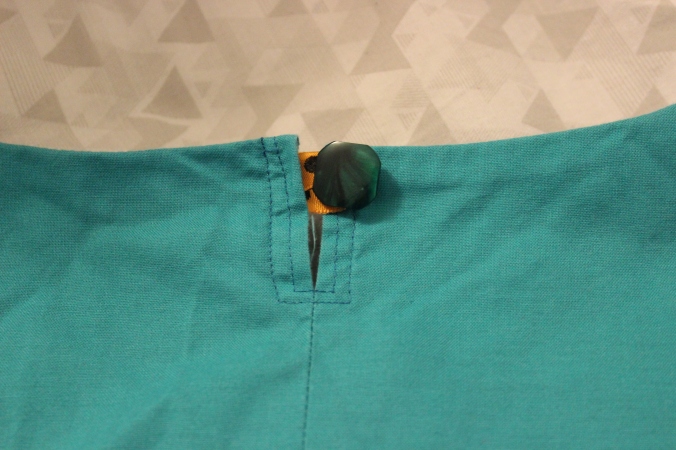
Oh and the neck has a pretty little button fastening.
Ain't that cute?

Ain’t that cute? Me being me, I had to use a contrast orange polka dot ribbon instead of the recommended self fabric.

So there we are. I made lots of clothes that I can wear for work with a cardi and look pretty smart. Maybe not my most interesting makes, but it can’t all be gold lame dresses sadly.

Have you made a work wardrobe?
Another blummin Moneta, but it is GOLD

I made this Moneta a while ago, but haven’t blogged it because, well it’s another Moneta and I thought you might be bored of them. But I do have a sweetener: LOOK AT THE FABRIC!!

Gold! Always believe in your soul You've got the power to know You're indestructible

Gold!
Always believe in your soul
You’ve got the power to know
You’re indestructible

It’s wonderful and ludicrous. It is described as a polyester jersey, but feels like a pair of nylon tights with glitter on. It’s almost plasticky. It clings to your figure. It’s odd. The glitter comes off on EVERYTHING. But it washes fine. It seems to have endless glitter. It never runs out. I got it for £3.99 a metre from Remnant House and I regret nothing. My husband hates it. Our car looks like it’s been turned into a mobile disco after I wore the the dress in it for a long journey.

There’s not much to say about this as I’ve made plenty of Monetas before so I will just leave some pictures of me glinting in the afternoon sun. I should have left it sleeveless because the arms keep rolling up in this weird fabric, but there you go. And yes I am wearing it over jeans for the sake of a hasty photo shoot. It’s not my most triumphant make, or the most flattering, but it is GOLD and that’s enough.

IMG_1396 IMG_1391

Subtle, non?

Subtle, non?

Hazel Max: Balloons and Stripes

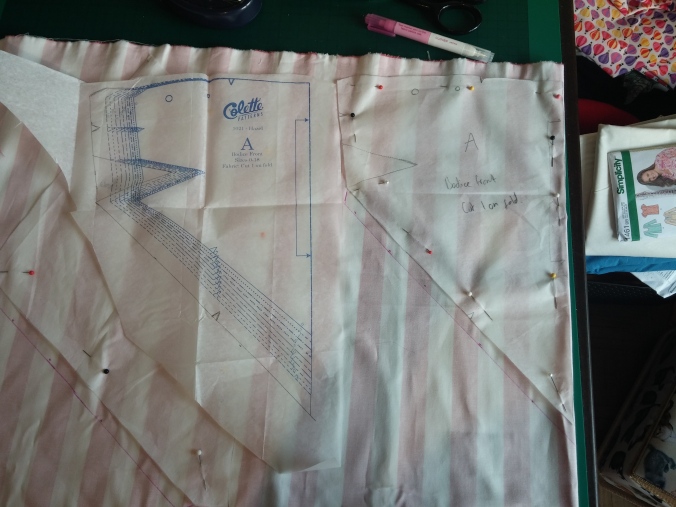
Upgrading patterns. GAH! WHY DO I HAVE TO DO IT????

Knit Colette patterns are in a size range of their own, which means very little to English people… what is 3XL? Is it 3 times as big as an extra large? Or three ‘sizes’ up? How big is a size? Who cares. I was happy with my Moneta pattern to not have to choose the biggest size on the pattern packet. That was very joyous. And apart from lengthening the bodice, no alterations were needed. The joy of knits! Woven Colette patterns are a different matter. They are gorgeous, but I’m bigger than the biggest size. But I wanted the lovely Hazel, the pattern said it was easy, and I thought I should have a bash at upgrading as it is a skill I am going to have to get used to. I seem to be one or two sizes bigger than the biggest size of all the patterns I covet. Ho hum, it’s just like shopping in high street stores all over again. I THOUGHT I WAS DONE WITH FEELING TOO BIG! BOO HOO.

Up up and away with my hot air balloons

Up up and away with my hot air balloons

Anyway, enough of my sob stories: I did make a pretty swish dress! This is actually my wearable muslin in cheapy polycotton, but I think I like it more than the proper version (more of which later). The fabric has lantern-like hot air balloons in jewel colours all over it, and its lovely. And though it was super starchy at first, it has softened really nicely after a couple of washes.

So how did I upgrade it? I did some maths. I worked out that the largest size (18) was two sizes too small at the bust, and three sizes too small at the waist. But as I was too scared to try and grade between sizes and also do a full bust adjustment on my imaginary new size lines, I just opted to upgrade by 3 sizes, or 6 centimetres all over. I figured I could bring the straps in towards my neck to deal with any over large bust issues and this would also deal with my narrow shoulders. Also, I am an F cup, and I had no idea how to do a full bust adjustment on a V shaped bodice, so I just went big all over. Which worked surprisingly well, in the main.

Upgradings

I love this dress, apart from the strange sticky out armpit bits. Something has gone wrong and weird with my upgrading of the facing and one of the bodice panels that means that I have a very gapey underarm. I should have taken a picture of this, but I have failed to. But needless to say, the bodice side under my arm seriously curves outwards, like a lipped bowl. I have made two of these dresses now, and can’t work out what I have done wrong. In both versions I took a lot of width out of the bodice panels either side of the zip, because I definitely did not need to upgrade three sizes in the top half of the bodice, so had to take fabric out of the first version, and amend the pattern piece for the second one, but this has not cured the gapey underarm problem.

Bits I took out

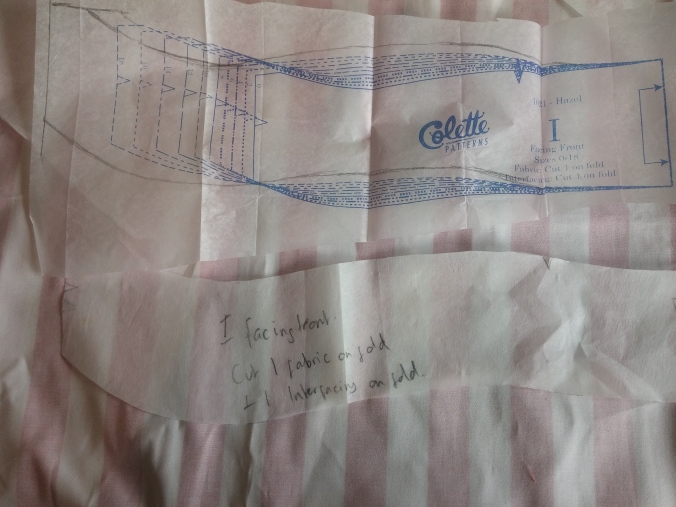
I think I need to go back to the drawing board with this one. The curves are in the wrong places because I took some fabric from the bodice. It might also be something to do with the fact I didn’t use much maths when upgrading the facing. I freestyled. OoooOOOooooHHH wavy lines……!

Swoosh!

In the first one, the bodice was a bit short, and to make it longer I had to attach the skirt below the point of the V. This looks fine, but isn’t proper. In the second one, I lengthened the bodice a bit which I thought was clever, because of the V. I realised I needed to make the V wider, to make it longer, though now I am writing this, that might explain my gapey armpits!! But how else would I make it longer without changing the angle of the v and messing up all of the other panels?!? Oh why oh why do I have to upgrade?!

Lengthening, or widening?

Anyway. I put in an invisible zip rather well I thought.

Nice zip, weird strap placement.

I shortened the straps to deal with my slopey shoulders by bringing them in at the back, forgetting about bra wearing. I like the way the straps look, but it needs a strapless bra. I’m really pleased with this frock, which was only ever meant to be a trial one. It’s partly my very apple shape, and partly my weird gather placement, but does make me look a little pregnant though…..

4 months gone?

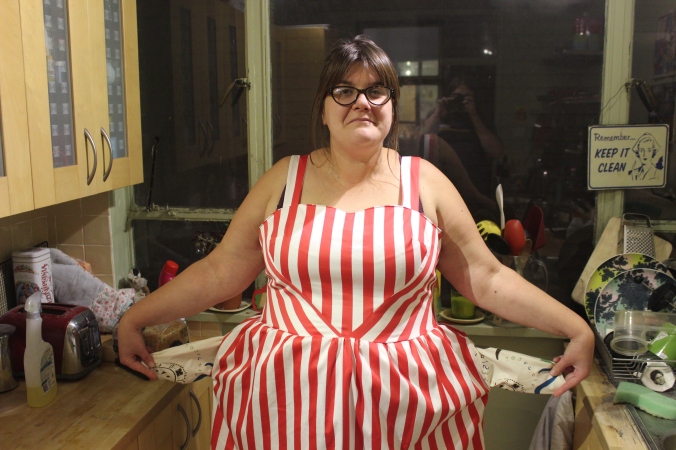
So Hazel number 2 is a big circus tent. The fabric I bought to make it is fat red and white stripes because it says on the packet you can ‘play around with stripes’, and I thought, ‘cor, I like the sound of that’. The fabric is a thick cotton with a bit of stretch, and having made the polycotton one, I can see it’s a bit too heavy. And it was a bit annoying to work with. It was very solid, and rigid when interfaced, and it crumpled a lot, though wasn’t very easy to iron. The thickness of it also made the gapey underarm problem even more stark. Look at it! (This is before I top stitched, but still)

Facing trying to escape

I sorted out the straps issue so they now cover my bra straps (at the back at least)

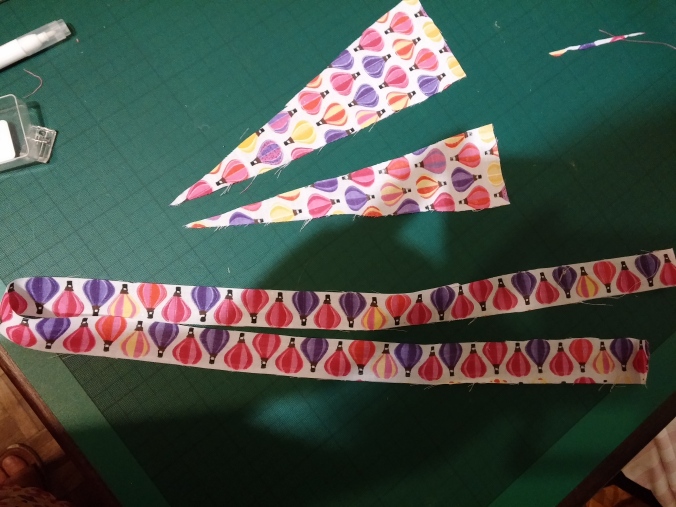
straps

straps

And I got a really nice pointy V on the bodice. It’s a very va va voom style when you play with stripes!

V for victory

V for victory

I used some totally hideous but really soft cotton from a pot luck pack of remnants for the pockets. It has clocks on it and is really nineties, in a bad way.

Ugh

Ugh

I had a sad moment when I tried to trim a seam to remove some bulk, (just as I was about to finish the dress) and  instead ‘trimmed’ the actual dress leaving a big hole. AAARRRRRGGGGHHHH

MISERY

MISERY

I shouldn’t sew when I am tired and grumpy. More haste, less speed Sparkleneedles, pay attention. But a little darn, a little hem, and it was done. Ta da! The circus tent dress!

IMG_1304

Ta da!

Ta da!

And that’s me and my upgraded Hazels done. Even though I need to work out the underarm gape/escaping facing problem, I won’t make any more for a while as summer is pretty much over and these are very summery dresses. Mind you…. I can always wear them with cardigans……

Winter Sun

Winter Sun?

Have you had any upgrading trials or triumphs?

Sewing with friends: two Monetas and a Boob Tube Thing.

I started my odyssey into sewing with a friend, and then that friend went and moved to Abderdeen. My upstairs neighbour Elona can take all the credit for helping me overcome the initial panic I felt  when I opened a dress pattern and didn’t understand a thing and wanted to throw my sewing machine out of the window. THANK GOD FOR ELONA. She taught me some simple sewing techniques like zig zagging hems and the point of interfacing and not throwing sewing machines out of the window, told me to choose a simpler pattern, and my sewing obsession was born. We did some sewing together which was great fun, and then she moved and I was bereft. We still chat sewing on WhatsApp though, and are planning on working our way through all the patterns from the amazing Tilly and the Buttons book, though will have to upgrade them, sigh. Anyhoo, I have been sewing toute seul since then, and though I really do enjoy it, and will write later about how restful and mindful and utterly absorbing it is, sometimes it is nice to be a bit less solo and to talk a bit. You know, be a bit less obsessive, a bit more social.

So I was delighted when my childhood friend Heather said she wanted to come up and sew with me for a weekend. Heather has a sewing machine and did some quite fancy sewing as a teenager, but hasn’t done any for ages and wanted to start again. I told her to bring three metres of cotton and we would go through my enormous and still expanding pattern collection and choose one she liked. She then said she would like to try her hand at a jersey dress, and so Moneta which I had recently conquered,  was agreed on. A few days before she came to stay, I found out why she was keen on jersey: she is newly pregnant, and needs expansion room! AWESOME!

So Heather arrived with the most gorgeous teal double knit jersey and we got down to sewing straight away. Heather’s sewing skills were quickly dusted off, and she was a total whizz. The Moneta came together like dream.

Here is Heather proudly modelling the bodice as a weird bolero

Here is Heather proudly modelling the bodice as a weird bolero

We graded up the dress a size at the waist for expansion room, but I think we should possibly have done two sizes. It was a hard choice between wanting to make something that looks nice straight away, and something that will be wearable for longer than a month. But it is one that will still be wearable post baby, so I think is ultimately a good thing, even if it will have to be put aside fairly soon. I also forgot that you use a twin needle from the right side, so we have a rather jazzy reverse twin-needle hemline finish, but it looks just fine.

And look, look, how very beautiful she looks in it!!

What a total dreamboat

What a total dreamboat

And then, I had planned on making my own, but thought it would be a bit rude to have a friend up from the south coast to have them sit around watching me sew in silence, so I did a few bits while Heather was not using the machine, and then we stopped to see a friend and eat roast chicken and crumble. The next morning we had planned on going swimming in the lido, but it was a bit grey and we had eaten a lot of chicken, so decided to do more sewing instead. Heather said she had seen some online tutorials for breastfeeding scarves, and they seemed too simple to be true. So we used this tutorial and after some humming and hawing, realised you do just make a giant loop. I dug out the remains of my ludicrously ostentatious but very soft and drapey giant pillowcase fabric and away we went! Heather doubled the fabric over to make it show a right side however it was draped as it had a very visible wrong side, and ta da! here we are……


What an awesome thing! And the scarf is pretty cool too. LOLOLOLOLOL.

After I bid Heather farewell I sat down like any self respecting totally obsessed new sewist would and finished off my own Moneta. I was making the sleeveless lined, collared version, and I DID NOT READ THE INSTRUCTIONS PROPERLY. Having only lined two dresses before at this stage and didn’t realise that sewing the lining to each outer piece was not the way forward. It did lead to nice armhole edges, but also to SO MUCH LUMPS! Look!


OH DEAR

OH DEAR


Not right

Not right

It was one time when the fabric being so flimsy and cheap was a bonus though, as it was still wearable with that bulk. Anything thicker would have been a disaster. I know I should have unpicked it and done it properly, but I was too impatient to see my nautical Moneta. So I ploughed on, and the flimsy jersey drove me round the bend……

Aargh so curly!

Aargh so curly!

But I succeeded. Here is me wearing it the night I made it……

TA DA!

TA DA!

LOOK! I made a collar!

LOOK! I made a collar!

I’m so pleased with it, and have worn it a lot. The fabric is excellent huh? It came from MyFabrics, but I warn you,is very thin, and pilled and bobbled almost straight away, which makes me a bit sad, but mainly this dress, thick seams and all, makes me extremely happy.

I even got my husband to take some proper blog style pictures at last!

Collar: I'm so proud as you can see

Collar: I’m so proud as you can see

I'm sideways!

I’m sideways!

So bloggy!

So bloggy!

A Colette Sorbetto for a hunk

My mum always used to tell me I would be the ideal Victorian woman. I was in fact, partially named after Queen Vic herself. Apparently when I was born, I looked ‘not amused’. But this was not why I was the ideal Victorian woman. No, that was because I had the shoulders of a goddess, according to the mores of the late 1800s.  I don’t really have shoulders: my neck kind of just slopes into my arms. Straps do not stay on these non-shoulders: I am forever hefting bra and vest straps up and using willpower to try and keep them there. In essence, my shoulders are too small. My mum tried to make me feel better about my endless strappy top woes by telling me a gently curving, small ladylike shoulder was a sign of Victorian gentility, that it meant I had not been toiling in the fields all day. I’m not sure why she thought Victorian gentility was what I would be pleased by: as yet another strap fell down by my elbows, I seriously considered a career as a farm labourer. If it was possible, I would become an olympian swimmer, so I could get firm broad shoulders that would keep my bloody straps up all day.

Navy blue Victorian evening dress with short sleeves and sloping shoulders

The type of Victorian Shoulders I possess

But I digress. Why am I telling you this? I am telling you this because I made a top that was very pretty, but which did not cater at all for my non-shoulders. But I am so glad I did, because, as with all these things I am making at the moment, they aren’t so much wearable items as educational projects, and with each new thing I make, I learn one or two more skills, or I identify skills that I need to learn for later projects. (I wear what I make anyway, even if it is a bit weird because bloody hell, I’ve put enough blood sweat and tears into it!).

So what is this project, and what did I learn?

Floral cotton vest top with bias binding round neck and shoulders

The Colette Sorbetto, as made by Colette for a person with Shoulders

A few weeks back I made myself the (FREEEEEEE!) Colette Sorbetto top. If you haven’t discovered Colette yet, you need to, and a good place to start is by downloading their free PDF pattern for the Sorbetto. Colette patterns are wonderful, as unlike standard sewing patterns, they are written in normal English, with clear, educational instructions and lots of pictures. They are also beautifully packaged and presented, offer and wide range of really fashionable, flattering styles, and are modelled by women of all sizes. Some patterns go up to size 3XL (which for Britishers like me is about a size 26-28). The website is super cool, and has regular sewalongs, lots of advice and a great newsletter full of top tips. So, I love Colette.

Enough gushing. What did I learn?

1: PDF patterns are an arse. This was free, so I can’t complain, but cutting out and assembling 8 pieces of A4 paper, matching lines exactly, was tedious, and the finished pattern pieces are rigid, opaque and likely to fall apart when your sellotape dries out. You also need a lot of space to put the pieces together. The Sorbetto is pretty much one of the easiest and simplest patterns in the whole world, and I still found assembling the pattern from a digital file tiresome. I would not want to do this with a more complicated pattern. I personally think it is well worth splashing out for tissue patterns (though of course they are also extremely annoying and take up space: they at least do not need to be assembled and sellotape is not involved), unless of course it would cost loads to import a pattern from abroad. Colette is an American company, but I have found at least one company that sells her tissue paper patterns in their gorgeous packaging at a reasonable price from the UK.

2. I love bias binding. Oh goodness it makes things look so neat, and retro, and colourful. It is really easy to put on, and makes your hems, necklines and armholes so nice and professional.  I am now compulsively buying bias binding in all the colours (alongside all the fabrics and all the patterns: sewing can be very expensive) to add a flash of cheerfulness to my creations.

3. I can’t really just sew a pattern without making some adjustments. One of the major reasons to start sewing your own clothes is to actually own clothes that fit you, and not a random mannequin in a factory. I sewed the size 18 straight up in a cheap and pretty polycotton with contrast binding.

A Colette Sorbetto as modelled by shoulderless me

A Colette Sorbetto as modelled by shoulderless me

It’s a nice and wearable top, but it could have been so much better if I added a couple of inches of length at the bottom and if I had known that such things as Full Bust Adjustments and Narrow Shoulder Adjustments existed, and in fact, could both be done at the same time. As it was, when I cut out the fabric I could see that this was going to pull a bit across the bust, so I just made my centre pleat a bit narrower, which is fine, but I would have liked a wide pleat. I Then realised this wasn’t enough so added a 3 inch extension panel in the back, so could have probably kept my pleat a normal width. I would also have liked the straps to sit on my shoulders, and narrowing the pleat in the centre and adding a few inches at the back actually meant they sat even further out than normal. The bias binding also tipped inwards due to the extra fabric around the neckline. An FBA would have solved my problems a lot better.

Inside view of garment back panel seams

The pattern was very busy, so it was easy to put a panel in the panel without anyone noticing (can you see?), but boy did that wreak havoc on my decolletage

Still, it’s a great, easy and wearable pattern, and one I will definitely make again, with the adjustments I know are possible. I am attempting both these adjustments right now for a wax print cotton summer dress, and I definitely haven’t got them quite right. The Full Bust adjustment has worked a dream, but the narrow shoulder adjustment just seems to have narrowed the strap a bit, rather than bringing it closer in towards my neck. Still, it’s a start, and I am learning all the time. One day, I will have a strap that stays on the shoulders Queen Vic herself would be proud of.