Upgrading patterns. GAH! WHY DO I HAVE TO DO IT????
Knit Colette patterns are in a size range of their own, which means very little to English people… what is 3XL? Is it 3 times as big as an extra large? Or three ‘sizes’ up? How big is a size? Who cares. I was happy with my Moneta pattern to not have to choose the biggest size on the pattern packet. That was very joyous. And apart from lengthening the bodice, no alterations were needed. The joy of knits! Woven Colette patterns are a different matter. They are gorgeous, but I’m bigger than the biggest size. But I wanted the lovely Hazel, the pattern said it was easy, and I thought I should have a bash at upgrading as it is a skill I am going to have to get used to. I seem to be one or two sizes bigger than the biggest size of all the patterns I covet. Ho hum, it’s just like shopping in high street stores all over again. I THOUGHT I WAS DONE WITH FEELING TOO BIG! BOO HOO.
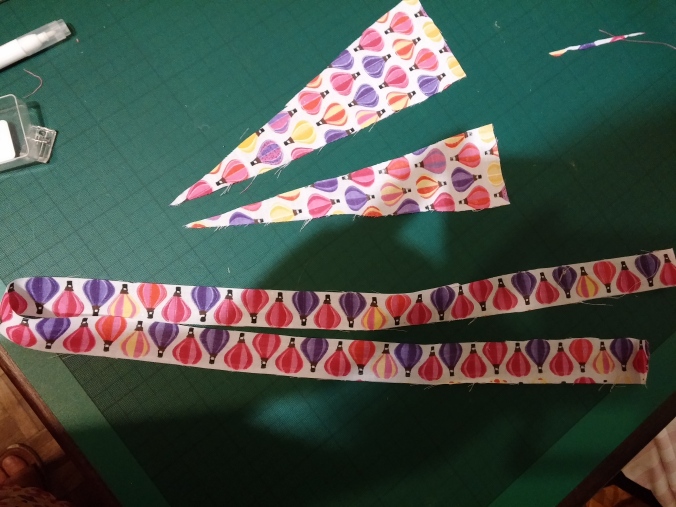
Anyway, enough of my sob stories: I did make a pretty swish dress! This is actually my wearable muslin in cheapy polycotton, but I think I like it more than the proper version (more of which later). The fabric has lantern-like hot air balloons in jewel colours all over it, and its lovely. And though it was super starchy at first, it has softened really nicely after a couple of washes.
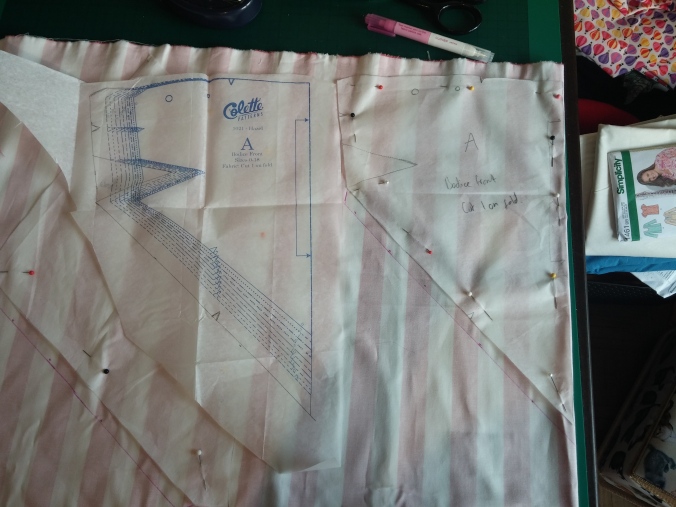
So how did I upgrade it? I did some maths. I worked out that the largest size (18) was two sizes too small at the bust, and three sizes too small at the waist. But as I was too scared to try and grade between sizes and also do a full bust adjustment on my imaginary new size lines, I just opted to upgrade by 3 sizes, or 6 centimetres all over. I figured I could bring the straps in towards my neck to deal with any over large bust issues and this would also deal with my narrow shoulders. Also, I am an F cup, and I had no idea how to do a full bust adjustment on a V shaped bodice, so I just went big all over. Which worked surprisingly well, in the main.
I love this dress, apart from the strange sticky out armpit bits. Something has gone wrong and weird with my upgrading of the facing and one of the bodice panels that means that I have a very gapey underarm. I should have taken a picture of this, but I have failed to. But needless to say, the bodice side under my arm seriously curves outwards, like a lipped bowl. I have made two of these dresses now, and can’t work out what I have done wrong. In both versions I took a lot of width out of the bodice panels either side of the zip, because I definitely did not need to upgrade three sizes in the top half of the bodice, so had to take fabric out of the first version, and amend the pattern piece for the second one, but this has not cured the gapey underarm problem.
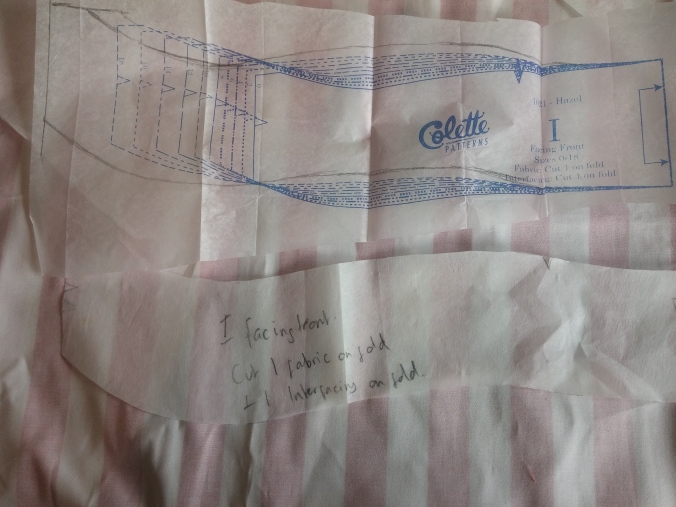
I think I need to go back to the drawing board with this one. The curves are in the wrong places because I took some fabric from the bodice. It might also be something to do with the fact I didn’t use much maths when upgrading the facing. I freestyled. OoooOOOooooHHH wavy lines……!
In the first one, the bodice was a bit short, and to make it longer I had to attach the skirt below the point of the V. This looks fine, but isn’t proper. In the second one, I lengthened the bodice a bit which I thought was clever, because of the V. I realised I needed to make the V wider, to make it longer, though now I am writing this, that might explain my gapey armpits!! But how else would I make it longer without changing the angle of the v and messing up all of the other panels?!? Oh why oh why do I have to upgrade?!
Anyway. I put in an invisible zip rather well I thought.
I shortened the straps to deal with my slopey shoulders by bringing them in at the back, forgetting about bra wearing. I like the way the straps look, but it needs a strapless bra. I’m really pleased with this frock, which was only ever meant to be a trial one. It’s partly my very apple shape, and partly my weird gather placement, but does make me look a little pregnant though…..
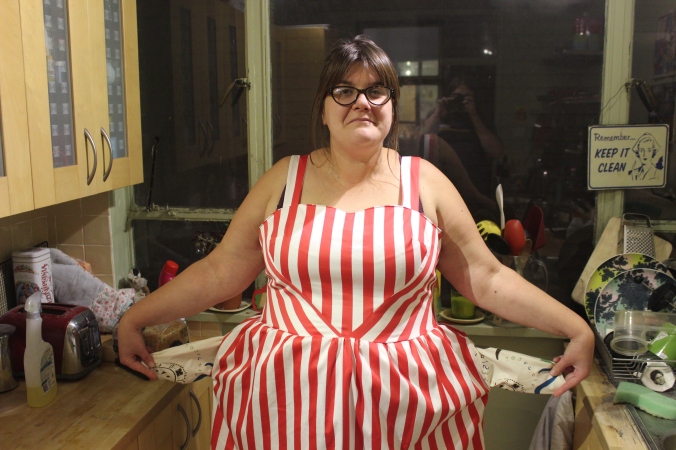
So Hazel number 2 is a big circus tent. The fabric I bought to make it is fat red and white stripes because it says on the packet you can ‘play around with stripes’, and I thought, ‘cor, I like the sound of that’. The fabric is a thick cotton with a bit of stretch, and having made the polycotton one, I can see it’s a bit too heavy. And it was a bit annoying to work with. It was very solid, and rigid when interfaced, and it crumpled a lot, though wasn’t very easy to iron. The thickness of it also made the gapey underarm problem even more stark. Look at it! (This is before I top stitched, but still)
I sorted out the straps issue so they now cover my bra straps (at the back at least)
And I got a really nice pointy V on the bodice. It’s a very va va voom style when you play with stripes!
I used some totally hideous but really soft cotton from a pot luck pack of remnants for the pockets. It has clocks on it and is really nineties, in a bad way.
I had a sad moment when I tried to trim a seam to remove some bulk, (just as I was about to finish the dress) and instead ‘trimmed’ the actual dress leaving a big hole. AAARRRRRGGGGHHHH
I shouldn’t sew when I am tired and grumpy. More haste, less speed Sparkleneedles, pay attention. But a little darn, a little hem, and it was done. Ta da! The circus tent dress!
And that’s me and my upgraded Hazels done. Even though I need to work out the underarm gape/escaping facing problem, I won’t make any more for a while as summer is pretty much over and these are very summery dresses. Mind you…. I can always wear them with cardigans……
Have you had any upgrading trials or triumphs?


Have you tried the Style Arc patterns? BeaJay from http://ontheroadtosewwear.blogspot.com.au LOVES them.
LikeLike
Yes indeed, my next post will be about the Style Arc Maggie. Gorgeous patterns, great size range, but the WORST instructions for a beginner ever! I nearly pulled all my hair out making that shirt! But I’ve got some other less challenging patterns to try from them which I am excited about 🙂
LikeLike
Love your balloons dress outfit! Check out those tights! (not the point, I know, but still).
So the Hazel bodice is quite hard to grade – essentially, it’s a princess seamed top (doesn’t look like it, but that’s what the triangle is doing). Traditionally with princess seams you add most extra at the side panel, and not at the middle, so that might work better here – leave the triangle as it is, but just extend the side panels using a princess seam Full Bust Adjustment (see Mary’s tutorial here http://www.idlefancy.com/2014/01/sewing-curve-fba-for-princess-seams.html). That should also help avoid the armpit gaping.
That said: you did a pretty good job just guessing, so well done!
LikeLike
That is so useful, thank you! Of course it’s a princess seam: why did I not see that!? Brilliant stuff: it looks like I need to make another one of these then!
And thanks for the tights praise. Told you I like to look like a children’s TV presenter at a rave 😉
LikeLike
You NAILED that look darling
LikeLiked by 1 person
Also, totally hear you on the sizing thing – Mary and I rant about it often. I put together this post a while ago that catalogues all the indie pattern companies and their sizes so you can see who will fit you:
http://www.cashmerette.com/2014/03/one-stop-guide-to-sewing-pattern-sizes.html
LikeLike
You are amazing, thank you. I think I will need to choose my patterns more carefully: upgrading is really joy-sapping.
LikeLike
The balloons are amazing and the stripes are incredible – how do you choose which one you like most? It’s impossible!
Also: hi! I found your blog while browsing through the sewing category on WP and I think you’re making some lovely things.
LikeLike
Oh thank you so much, and welcome on board! Are you sewing too?
LikeLike
Indeed I am! I just got back into sewing and I’m loving it.
LikeLike
Brilliant! Are you going to blog about your creations?
LikeLike
I love your sewing journey! You are doing a great job – and have style and panache! Most of the time when I grade a pattern up (or down – but usually up.) I don’t bother grading the facing, it gets too fiddly. I just make a whole new facing. It is easy. Using your front and back pattern pieces you just trace them off . I usually make them 2 inches deep (not sure of the metric) with the seam allowance added for the top and for the side seams, and then also the bottom finished edge.
LikeLike
Thank you so much Patti: this is such useful advice! I will definitely do that next: that sounds soooo much better than my wibbly wobbly versions. Thanks also for your kind words, I really appreciate them 🙂
LikeLike
Hi Sparkle,
After our exchange this morning on Curvy Sewing Collective about embroidery I thought I’d look your blog up. I have to say I’ve really enjoyed it. Your writing style is engaging and your enthusiasm for sewing shines out. I’m impressed with how you’ve challenged yourself and how much you’ve accomplished in less than a year. You’re well on your way to consistently seeing/designing something you like and being able to make/change/tweak a pattern, sew it up and be very pleased with your finished project because it meets your own high standards. And I’m glad to hear you are pleased with the work you’re doing now because you have every reason to be.
I’m so sorry to hear you cut into your dress while trimming. Unfortunately these things happen even when you’ve been sewing a while. In college I was trimming some stray fraying fuzz poking out of the french seams of my beautiful and laboriously sewn and custom fit purple silk charmeuse blouse while waiting to meet with my teacher to evaluate my skills/garment and I snipped a half inch gash into the blouse! My instructor was nice about it and didn’t penalize my grade for it. I realized right away it could not be rewoven because it would show, and resolved to put on a brave face, said it was “a good embellishment opportunity”, but I wanted to be cry and be sick. In fact, I never did figure out what to do to save it and I have since outgrown it, but it lives on in my closet because I just can’t bring myself to get rid of it after all that work. Perhaps I should add it to my teaching samples to show we all make mistakes while sewing?
LikeLiked by 1 person
Hello Mel,
Thanks for coming over here, and welcome! Your kind words mean such a lot, it’s really nice to get such encouragement from such an accomplished sewist! It’s also nice (if I’m honest!) to hear that you sliced into something too. Your story nearly made me scream and cry too, as it must have been so upsetting, but it is good to know that it can happen to anyone. I’m sure your pupils will love to see it! The shirt sounds amazing: I hope you made another equally lovely one instead.
LikeLike